How To Build A Gaming Coffee Table
The Idea
When I got heavily back into the hobby, one of the things I really wanted was to be able to play some games in the living room. I work during the day, and I like to unwind at night. The only space I had to play anything was in the kitchen, we can be cold and dark at night time. I had a tiny coffee table, but I could barely get most boards on it, let along play something.
I considered buying a table, but they were either too small or too expensive. So me being me, I decided to take matters into my own hands, and make my own!
I didn’t have masses of money to spend, and I only have basic DIY skills, so I headed to the internet for inspiration. I wanted to re-use some old wood of some kind, as I like the worn and weathered look, so I turned to an old favourite – pallets. I’ve used them in the past to make raised planting beds for the garden, so I know they’re hard-wearing and cheap – a good combination in my book.
Before we go into the details, I want to state up-front that this is what worked for me. I don’t have plans to download, and just because it suits me, doesn’t mean it’ll work for you. Your mileage may vary, and all of that. Anyway, enough talking, let’s get on with the build.
Stuff You’ll Need
Materials
- 1 or more wooden pallets in good condition
- Galvanised screws and nails
- Legs – I chose short hairpin legs
- Oil
- String or rope
- Screw-in eyelets
Tools and Equipment
- Power drill
- Sander – I bought a small, palm sander
- Jigsaw or table saw
- Crowbar / jimmy / pry bar
- Workbench
- Tape measure
- Pencil
- Hot glue gun
Some of this stuff I already had, some I bought. I had to buy the sander and a jigsaw, but these were tools I was already lacking and wanted to buy anyway, this project was just a good excuse to do it.
The Build
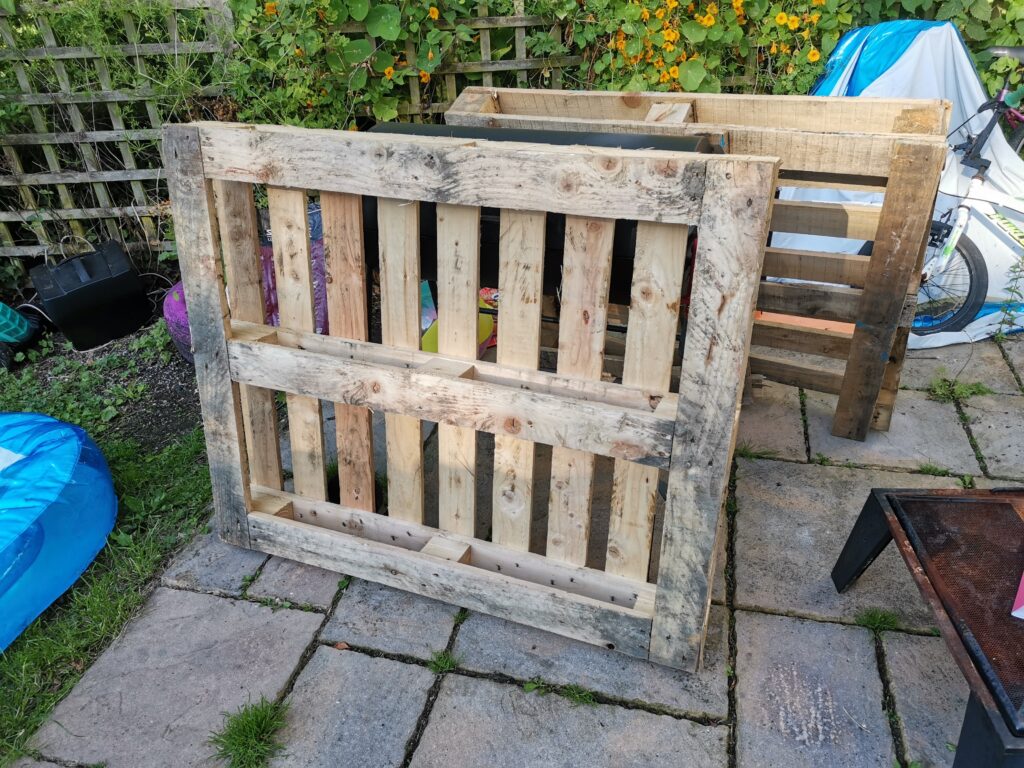
The first thing I needed was the wood. From my previous experience of building some raised planting beds from pallets, I knew this was the way I wanted to go for me. In most places, pallets can be picked up for free, or very little money. Have a look on Facebook marketplace, Gumtree, or ask around at local industrial units. If you see a pile of pallets outside, ask, and there’s a good chance they might let you have one.
I went to a local skip hire place as I know they have a massive stack or pallets and old wood that’s available for free. I was lucky on the day I went and picked up a complete pallet, and another with a little damage done to it. At this point I didn’t really have a design in mind, or know how well it would go, so I erred on the side of caution and made sure I had a good source of potential spare pieces.
The Design
The first thing to do is measure the space your table is going to live when it’s finished. Put string or card down, make sure you can walk around it, that it’s going to work in your living space. I knew I wanted my table to be as wide as the pallet’s shortest edge, and slightly shorter in length.
While I was making my measurements on the pallet (and this is my first major tip – make a lot of measurements) I noticed that the gaps between the planks were almost exactly half the width of a plank. Bonus! I knew this meant that if I cut down the pallet to remove three planks, by splitting the planks I removed lengthways, I would have enough pieces to fill the gaps in what was left. I had my plan.
Breaking The Pallet Down
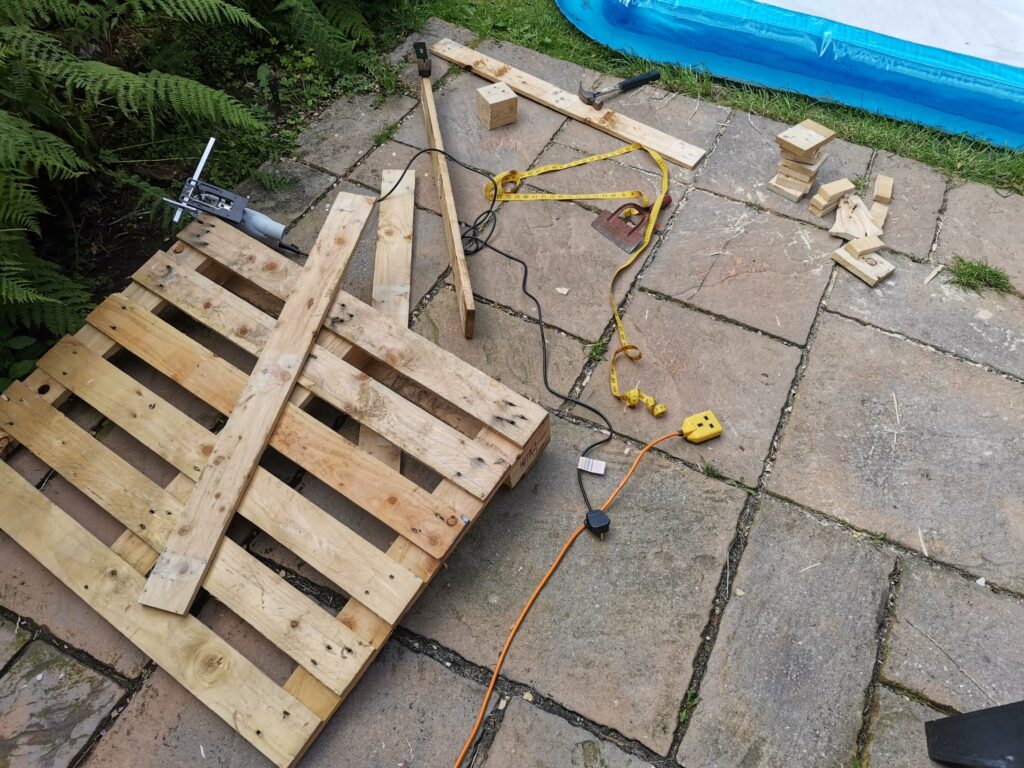
If you’re using pallets, remember that they’re designed for carrying big, heavy loads. They’re meant to last. What this means to you and me is that they don’t want to come apart easily. I started by working my crowbar into whatever gaps I could and trying to loosen things, but that didn’t go well. It took me hours, and I barely moved anything.
The nails holding it together were really long, and bent, so while a few did come out, most wouldn’t budge. In the end I decided to create a little room between the blocks and struts underneath, and then use a metal-cutting blade in my jigsaw and to cut through the nails. Once I did that, it came apart really easily.
Then all that remained was cutting it to length.
Splitting The Planks
With the basic shape and design of my table decided on, and the pallet being cut-down to size, it was time to start filling in the gaps. I set the workbench up and clamped each plank in place, then with the jigsaw fitted with a wood blade (tip number two – Don’t try to cut metal with a wood blade, or vice-versa. If you do, you’ll make lots of trips to buy new blades, trust me) and the parallel guide set to the right distance on it, I started to cut the planks in half.
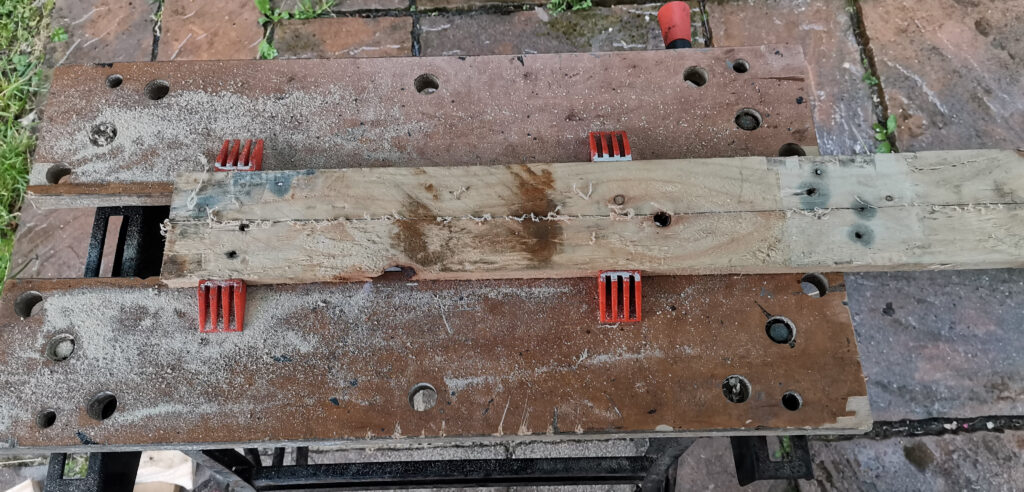
When you make any cuts, go slow and steady. Wood has a grain, and knots, and holes and all other kinds of imperfections, especially pallet wood. Jigsaw blades are flexible, so even with a guide attached, you’re going to get some wobbly cuts. This wouldn’t be the case if you have a table or circular saw, but if you’re reading this, you’re probably after the cheap option too, so just remember it doesn’t matter too much.
With all the planks cut, I did a dry run of the construction, and figured out which split planks would naturally fit in which gaps better. Some didn’t fit, but that’s okay, at least I could use a pencil to number the gaps and the filler planks, so I knew what went where. That might not sound that important, but when you’re surrounded by very similar-looking pieces of wood, it’s very easy to try putting one in the wrong place, or the wrong way up. You’ll almost certainly need to sand the edges of some to get them to fit, and I wouldn’t even try to do this job with sandpaper or a sanding block. If you’ve got more than a millimetre to take off anywhere, it’s going to take you a long time and a lot of sandpaper.
Completing The Tabletop
If you have any tight fits, don’t worry, a rubber mallet and an offcut of wood to protect the plank you’re hitting, and it’ll go. Here’s my table after sanding and fitting the planks:
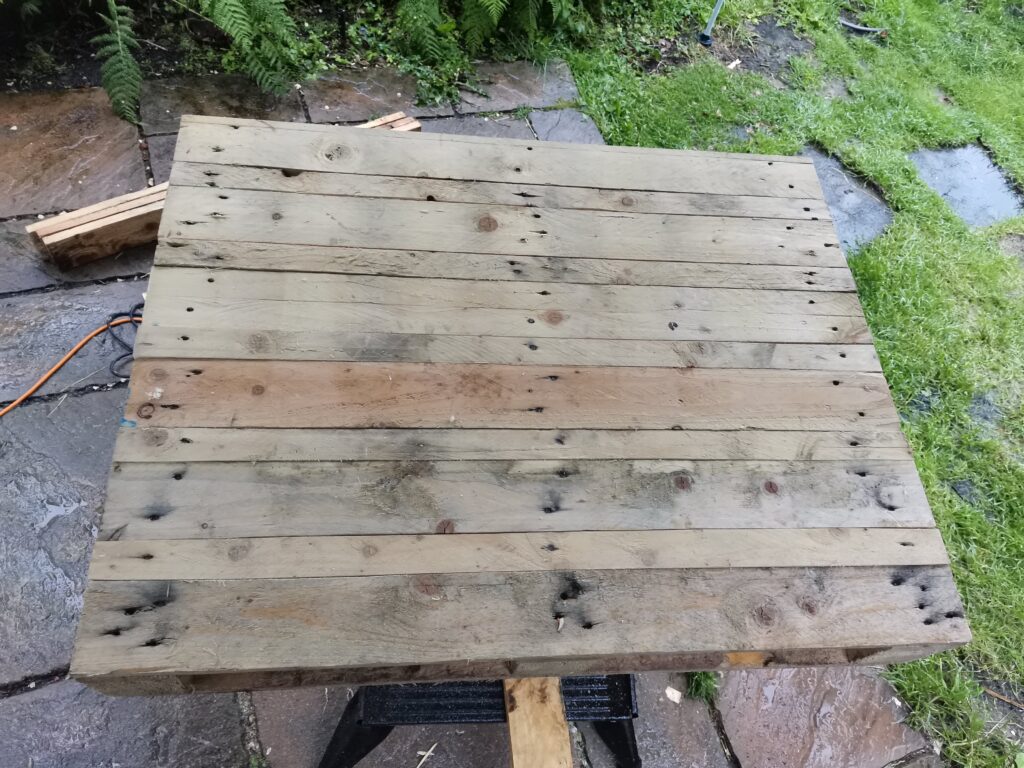
Once you’re happy with the layout, fix the planks in place. I use a mixture of drilled holes and galvanized screws, all countersunk and screwed down really well, and the occasional nail in a pre-existing nail hole. Whatever you use, make sure everything is lower than the top of the wood. When you come to sand and protect the wood, a protruding piece of metal will destroy sandpaper and cloths.
Before you start to make the table look prettier by sanding and oiling though, it’s time to finish the underneath.
Completing The Base
This is one of the easier jobs if you’ve made it this far. The big, cube blocks can be fitted at the halfway points on each edge, with one in the middle. To attach them, nail through from the top side, and again, make sure nothing sits proud of the tabletop. Then cut-down the supporting planks for the now-shorter edges, and check it all for fit.
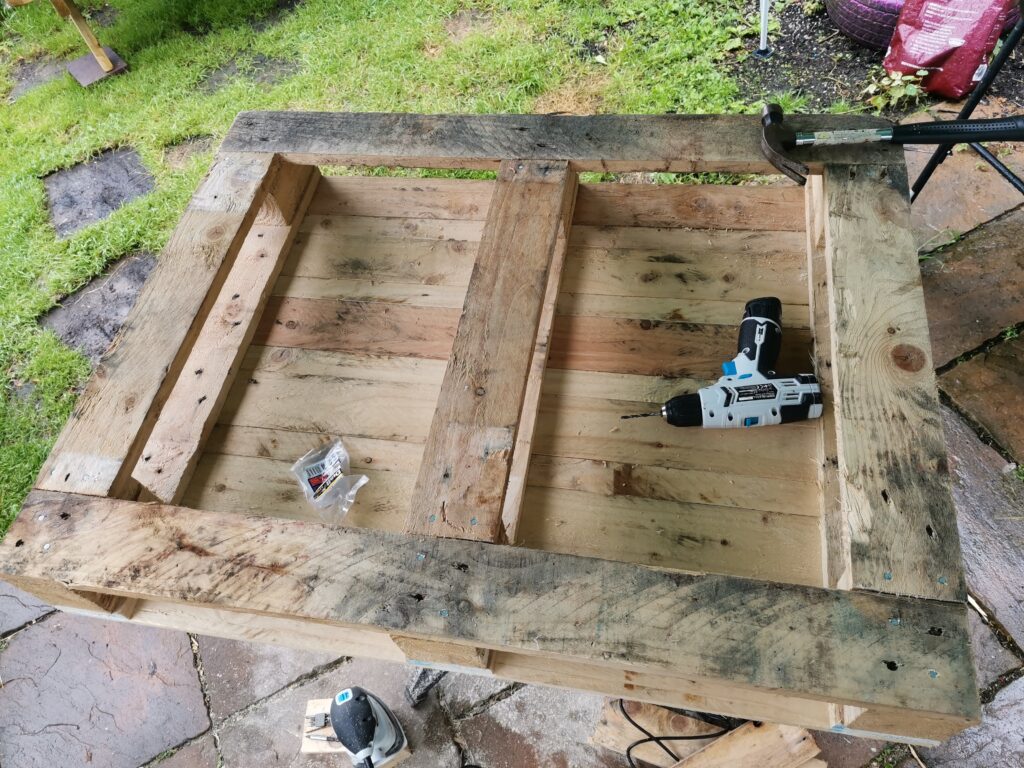
Again, I used a mixture of screws and nails where necessary to attach the bottom boards once I was happy with the fit. With any luck you can now flip it over, and it’s starting to look like a table!
Legs
A table isn’t much use if it’s flat on the floor, so the next step is to add some legs. Again, these will come down to personal preference. I opted for a set of smaller metal hairpin legs, that I bought from Amazon.
Fitting them was pretty easy, just place them on the bottom first to check for fit and balance. then use whatever fixings and guidance came with them.
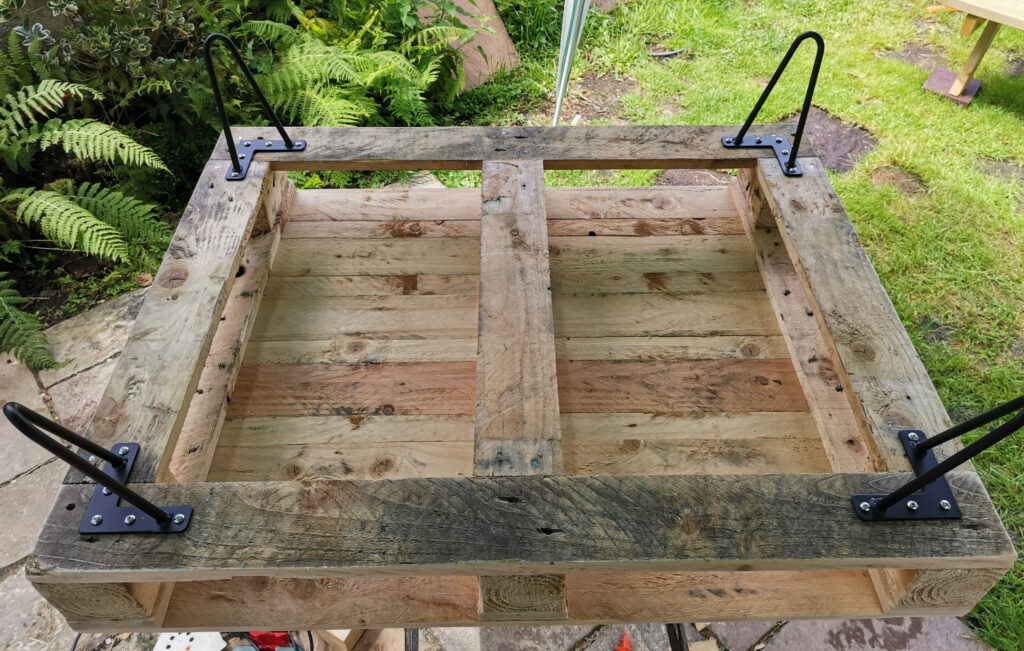
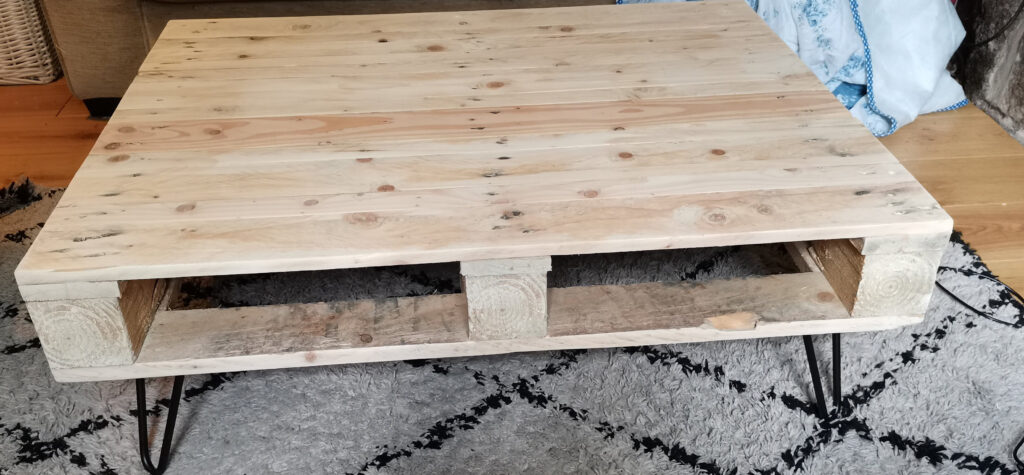
As soon as the legs were attached, I really loved the look. The aesthetic was exactly what was going for. As the legs are angled outwards, I took the time to make sure they didn’t extend past the edges of the table, as I knew I’d end up stubbing my toe on them every five minutes.
As a little reward, take the table where it’s going to live and have a look at what you’ve got so far!
Finishing The Tabletop
Pallet wood is rough. It’s designed to be functional, not pretty to look at. You’ll be able to see that when you look at your table at this stage.
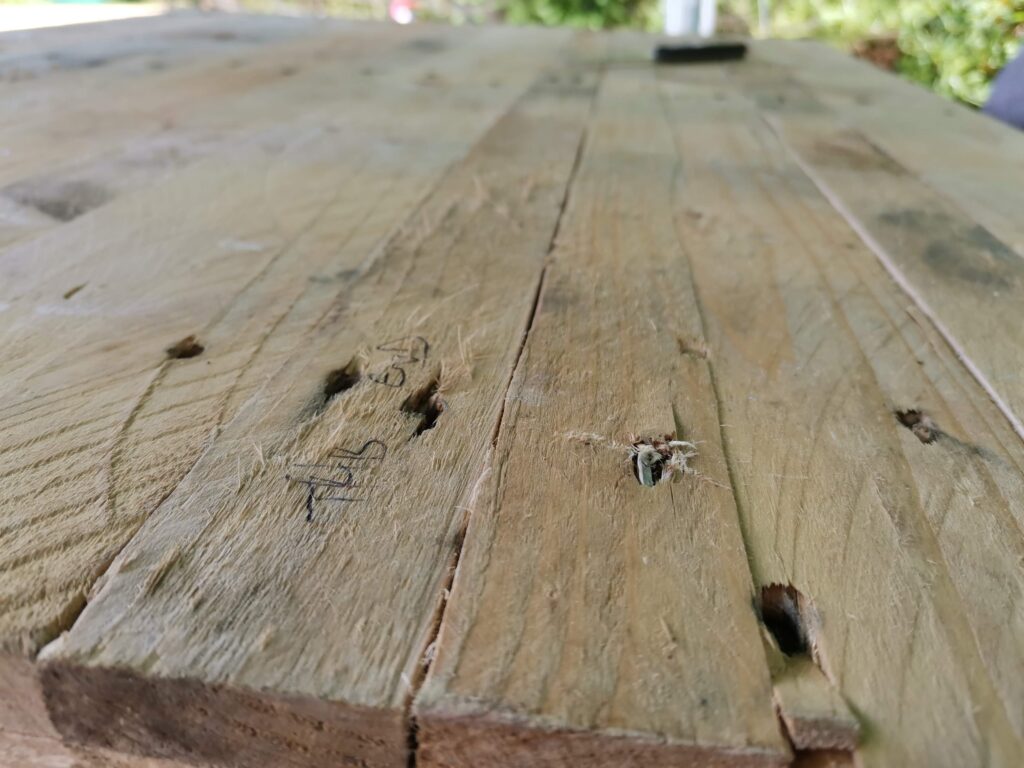
This is where you need to invest a bit of time and elbow grease. Start with a coarse grit sandpaper and get the worst of the splinters and roughness off, and then work down through finer and finer grits until you’ve got something that’s smooth to run your hand across without getting splinters. The exact finish is personal preference, and I wanted something smooth, but not perfect. I wanted the rough-and-ready look.
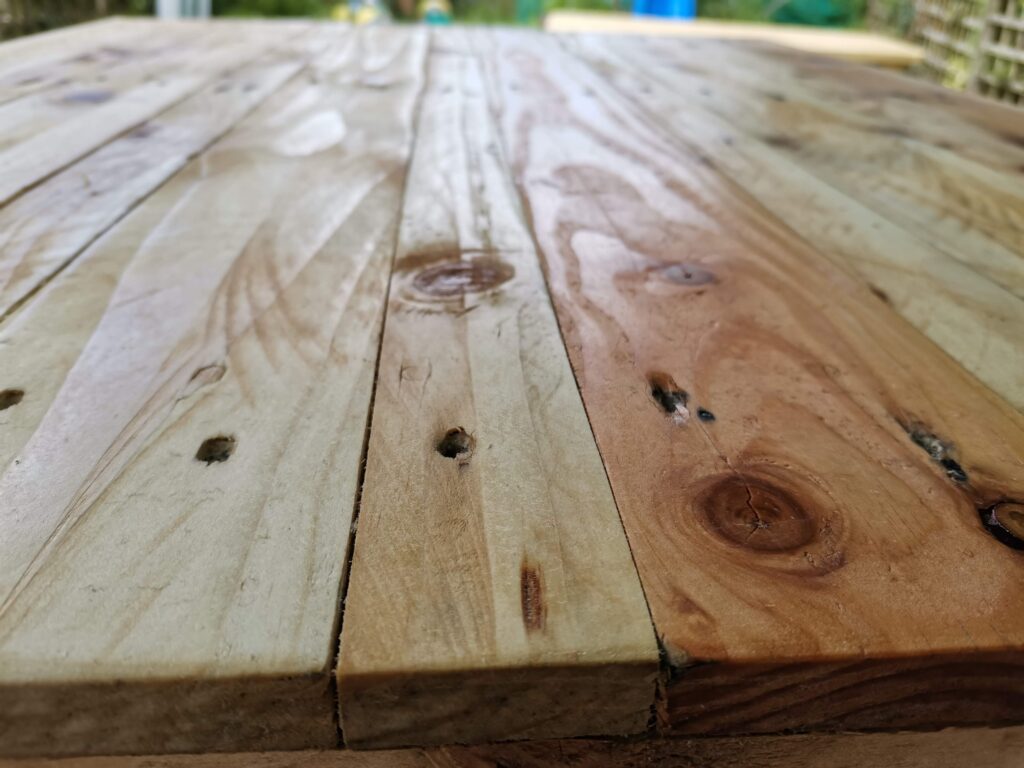
Next, you really need some kind of wood treatment. This will help to protect the wood for years to come, and make it look a lot nicer. There are a lot of choices, and this really will come down to personal preference. There are all manner of waxes, oils, lacquers and varnishes out there. I went for Danish Oil.

I chose this as it’s non-toxic, and I have a young son who’ll be using and playing on the table. It’s also very light in colour, and I didn’t want dark wood. Thirdly, it has a very light lacquer, but not a hard, shiny dining table feel of a finish, which is perfect, as I really wanted this to feel a bit rugged. Whatever you choose, read the bottle carefully and follow its instructions to the letter, especially in terms of drying times and ventilation.
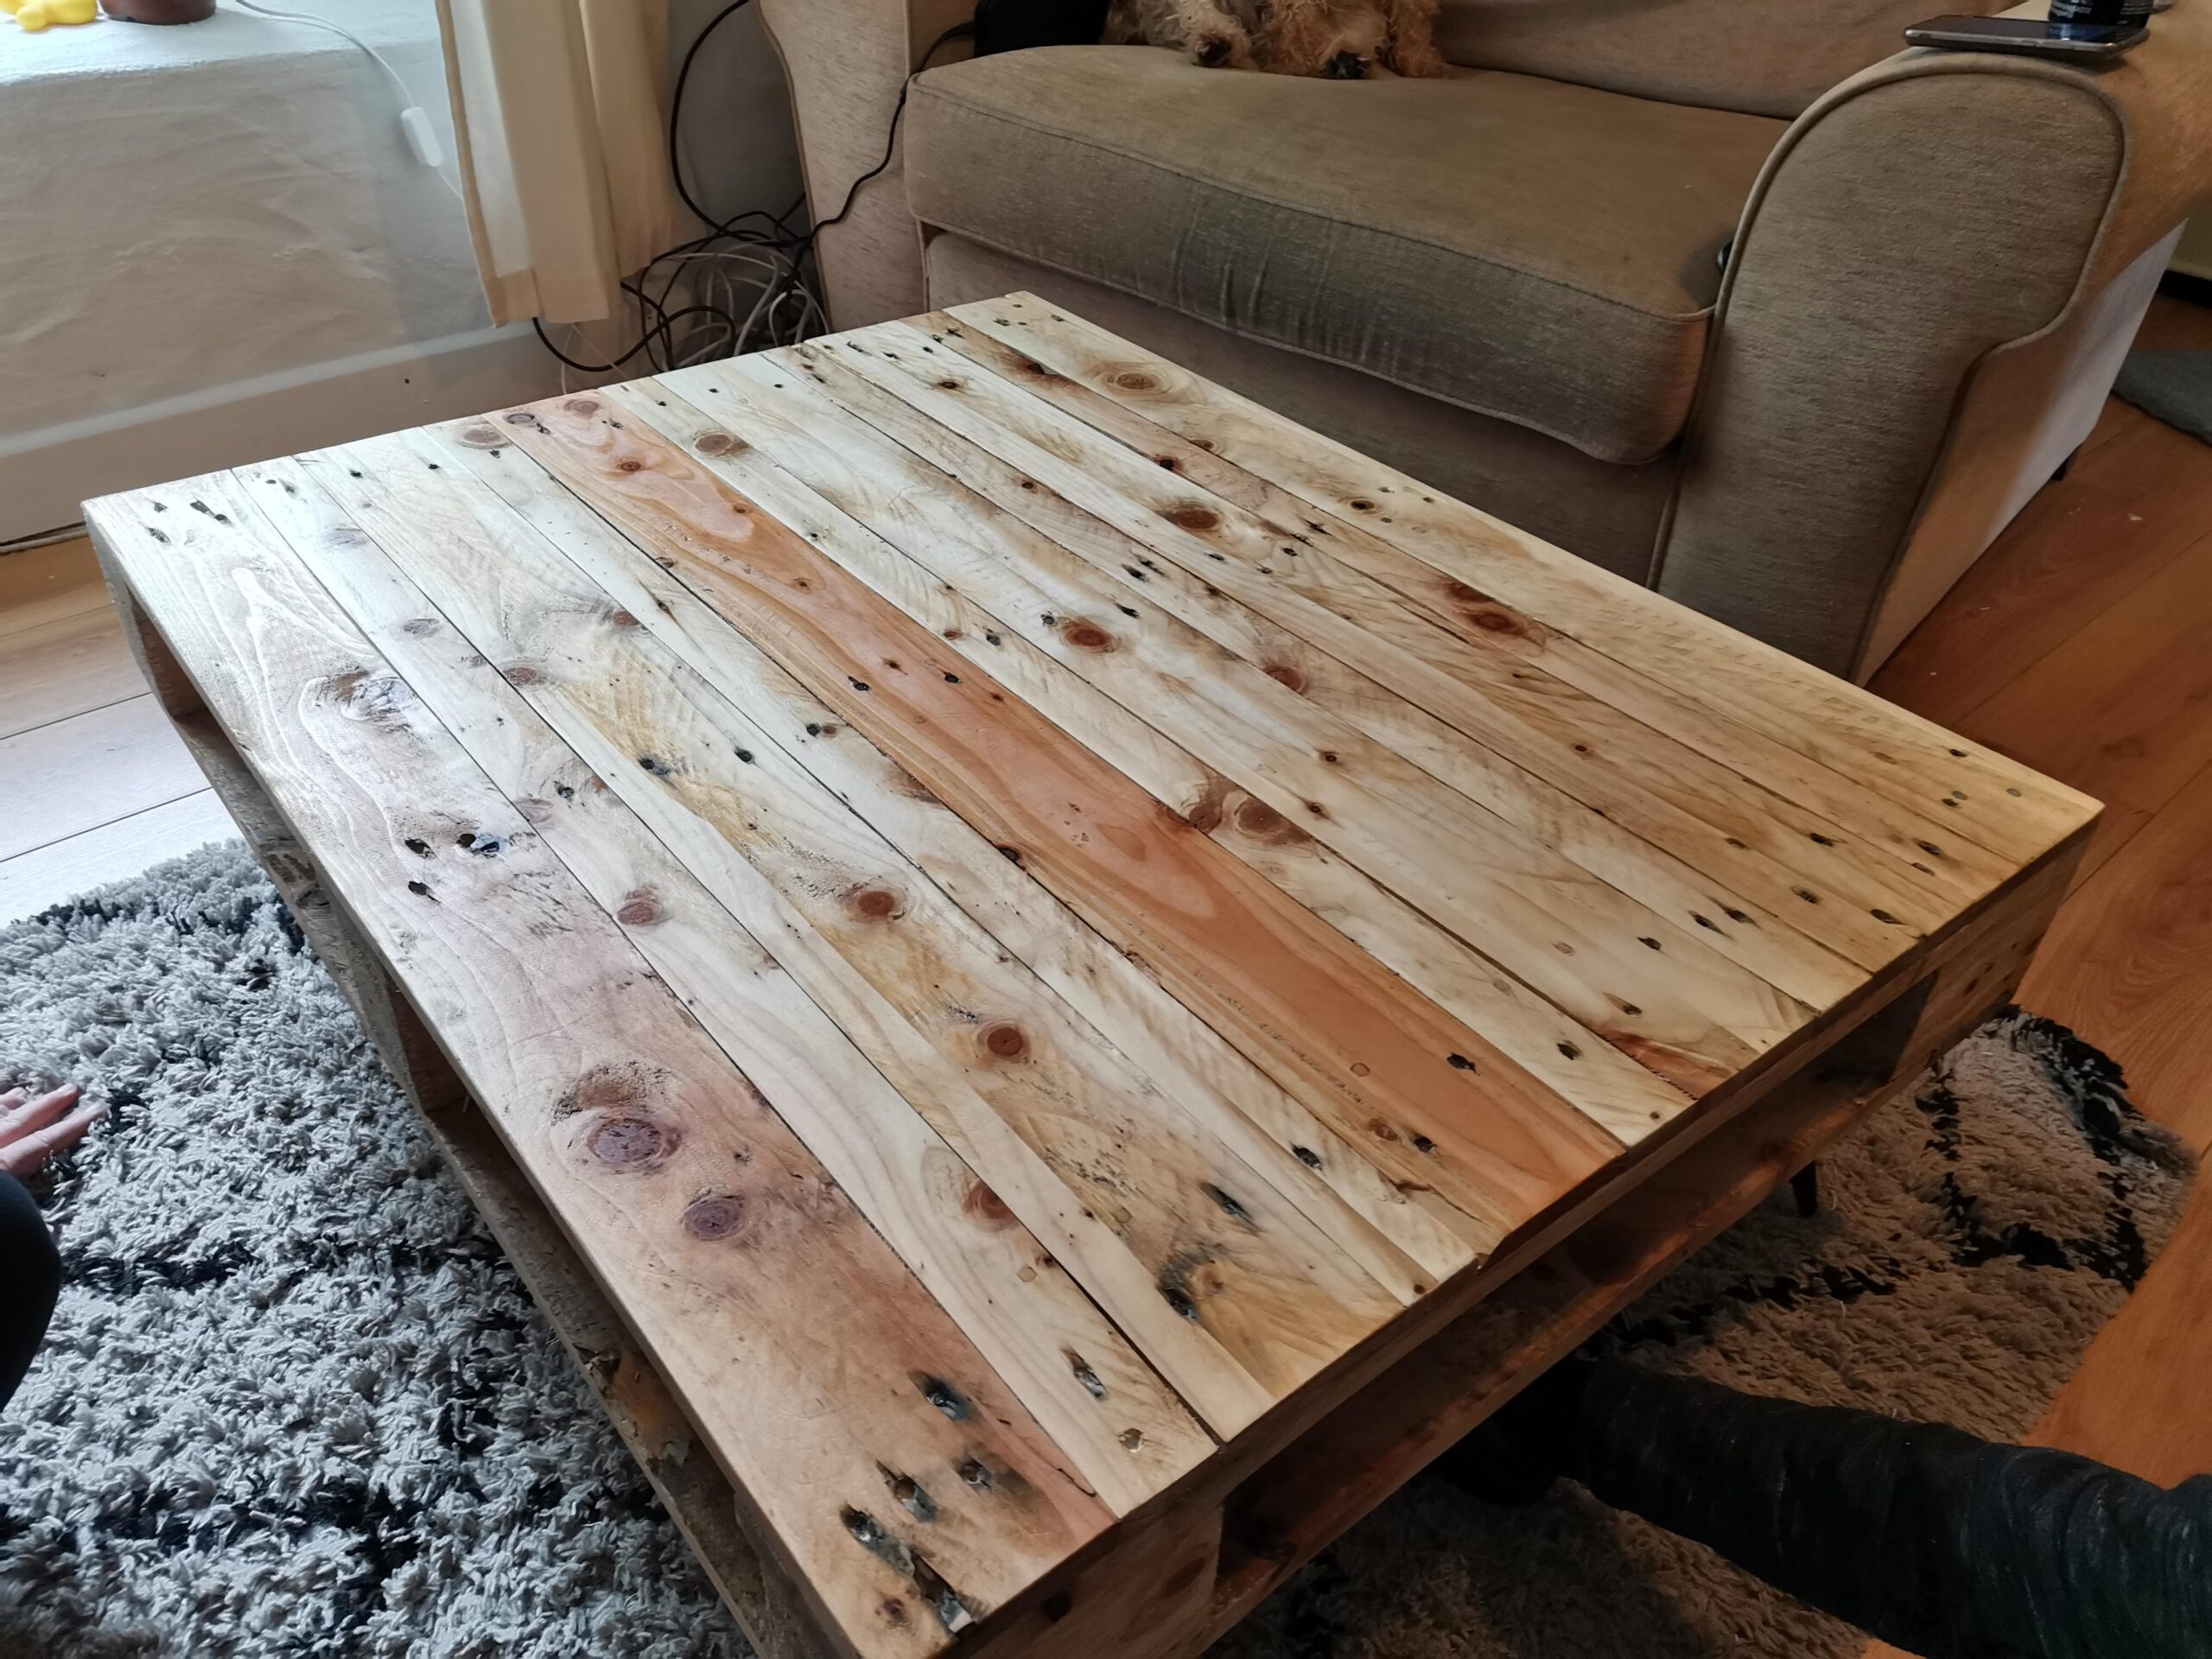
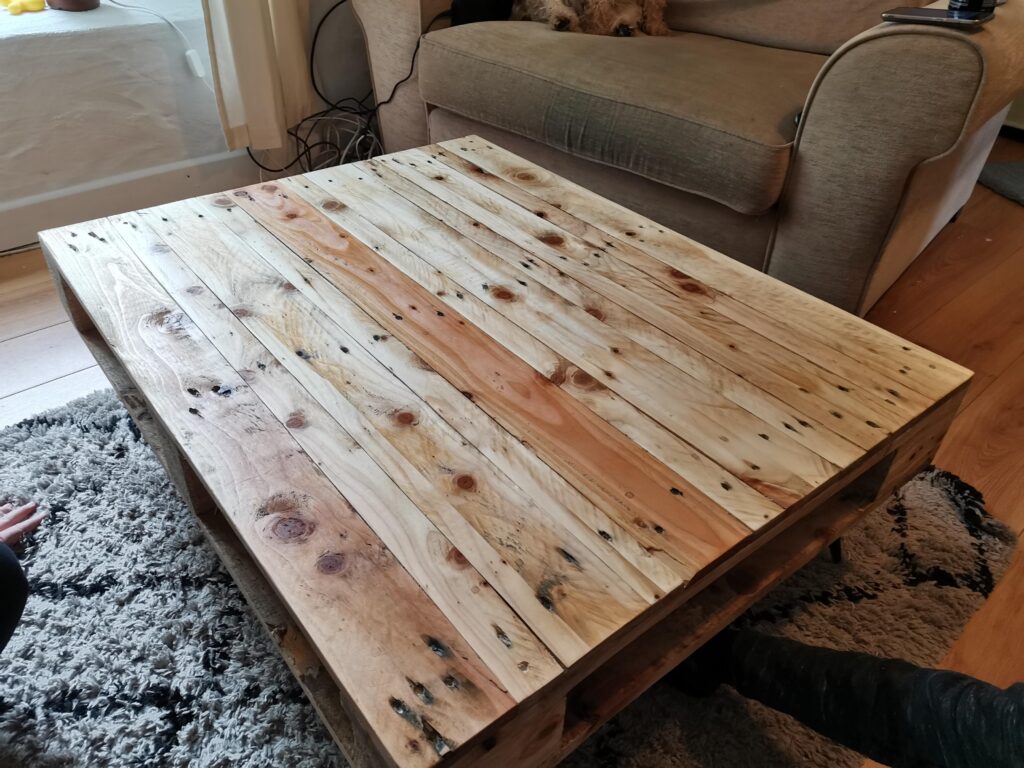
When you’re done, you should have something that looks a bit like this:
Completion
If you’ve made it this far, chances are you have something that resembles a table now. Time to bring it indoors and admire your handiwork.

I’m over the moon with how my table came out. I wasn’t expecting much with my lack of woodworking skills, but it’s really pleasing to have something so solid and attractive, and to know that I made it myself. This was made months ago, and it’s still rock solid, with no damage at all.
This being a board games site, I can also happily tell you that I’ve not found a single game yet that won’t fit on there. I’ve played Paladins of the West Kingdom, Anachrony, Maracaibo and plenty of others with no issue at all.
This love of board games though, and my noticing the unused space let me on to the extra steps I took. This isn’t necessary, but if you’re going to build a table from a pallet and want to use the underside for storage, read on to find out how I did it.
Storage
It seemed like a shame to have that potential storage space between the top and bottom of the table and to not use it. I searched for hours online, looking for drawers, baskets, and any other storage solutions I could think of that I might fit in there. In the end, I decided to stick with the rustic look, and took matters into my own hands.
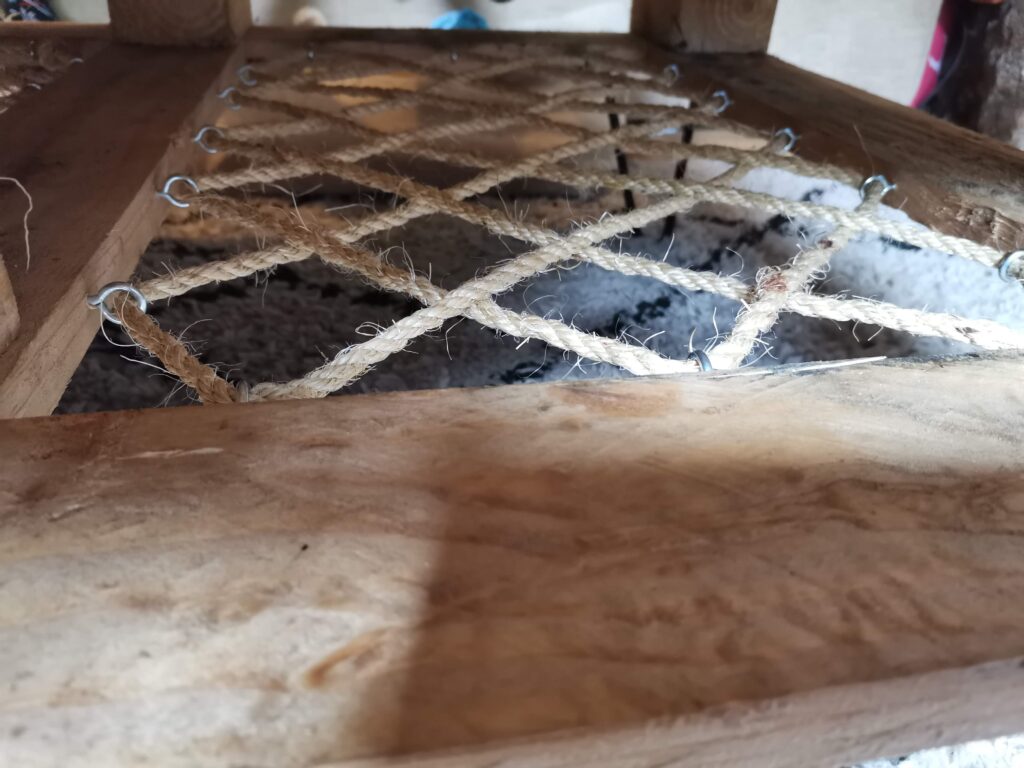
I went back to my local DIY store and bought a long length of sisal rope, and a few bags of screw-in eyelets with diameters bigger than the diameter of the rope. I planned out on paper how many I’d need along each edge to make a net, or web, in the gaps underneath.
The eyelets just screw in and don’t need pre-drilling, and then it’s just a case of threading the rope, and making sure you’re happy with the result. Keeping it tight is tricky, and I’d recommend having someone else available, if possible, to help keep tension on the rope. Where the two ends meet, tie a rough know, trim the ends off, and use a generous glob of hot glue to make sure they never come apart. Ideally keep this join in a corner, out of sight.
When it’s done, it looks pretty good, if I do say so myself.
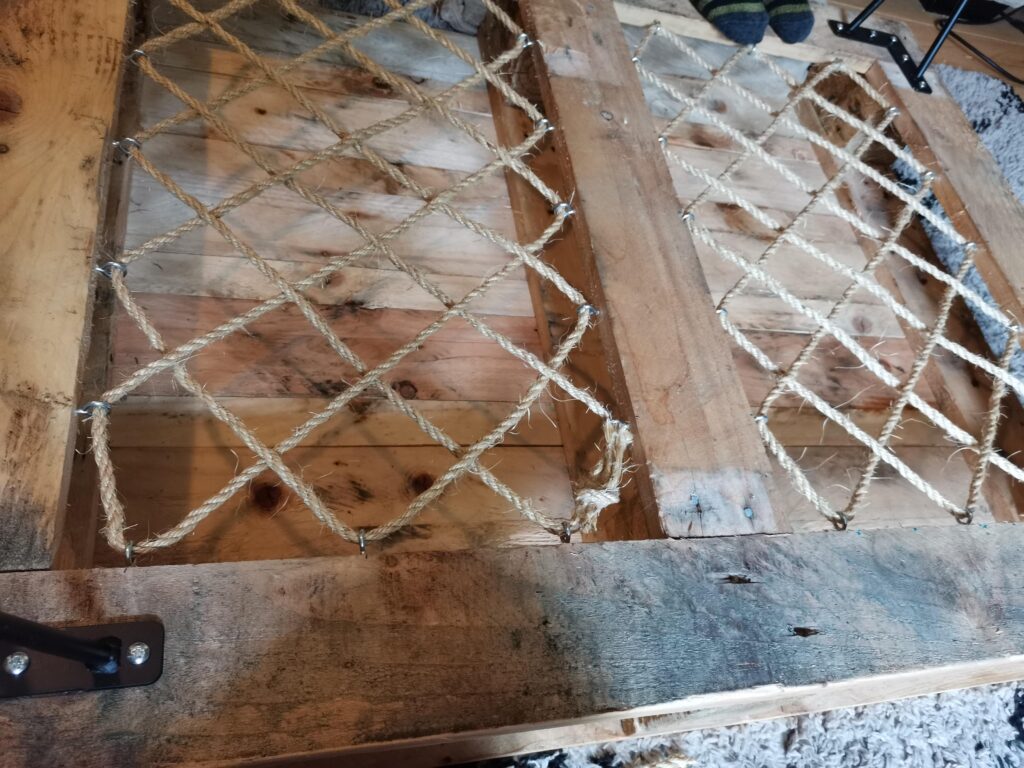
I can happily report that you can store at least five or six decent sized games under there, which is great if they’re your regular ones to the table.
Thanks For Reading
That’s all there is from me. Thanks for reading my guide. If you’re building something yourself, good luck. Let me know how you got on, or ask me any questions you might have by dropping me an email.


